Tips And Tricks On Cleaning Your Games And Consoles

Sounds pretty self explanatory, but here’s some simple tips and tricks to help you when you encounter something not so straight forward.

Cleaning:

  • Water: When I scrub dirty consoles I buy off Ebay or get from a friend, I usually just use water, sometimes warm if the console is sticky.
  • Soft Bristle Brush: Soft bristles can still add very fine scratches to your console’s shiny parts, but not as bad as stiff bristles, which will rape the sheen from them.  Even though brushes can add fine scratches, they also can get into the small crevices that a paper towel or terry cloth couldn’t.  Best used only for crevices or to scrub dried hand grease.
  • Dawn Dish Detergent:  Works great to get rid of “smoker” dirt and smell or sticky residue.
  • Paper Towels: Good for scrubbing flat surfaces without damaging the finish or for drying.
  • Air Compressor: This is optional, but makes drying your console and getting water out of crevices and off RF shields very quick and easy.  It’s also way better at removing dust than canned air.  Just today I hit an old Sega Model 1 board (drenched in dust and dust bunnies) with 100psi for a few seconds and BAM, the board looks almost new.  It will also dislodge dust from inside the cartridge connector.

How to protect your stickers when scrubbing:

Here’s a dirty Sega CD I’m currently repairing.  It needed to be scrubbed bad, but the top shell of this system, which is the part that usually has no stickers on other systems, has a sticker.

DSC02212

You need to protect the sticker so you can scrub away.  What you do is clean the dirty area around the sticker by hand.  Cut a piece of paper out that is slightly bigger than the sticker and lay it on top of it.

DSC02218

Grab yourself a piece of duct tape and, after placing the paper over the sticker, place the tape over the paper.

DSC02219

Use your fingernail and press down firmly on the tape so it conforms around edges and corners and forms a water tight seal around the paper and sticker.  Now scrub away.

DSC02220

Needless to say, now it’s clean.  Peel your tape back after you’ve dried the plastic around it and you should be good to go.  Don’t reuse the tape if you’re doing multiple similar consoles!!  It won’t hold as water tight as it did initially!

Cleaning Permanent Marker And Other Mysterious Marks:

Recently I was trying to clean some permanent marker off some used N64 games I had bought.  Alcohol wasn’t doing the trick, at all.  So I tried some Acetone.  BIG MISTAKE!  Instantly the acetone melts the plastic and will smear it until it has evaporated.  It did, however, get the sharpie off!

I also had a Dreamcast that a friend gave me.  It looked like it had been stored under a mound of old tires.  Dawn and hot water, mineral spirits, and denatured alcohol did nothing for it.  To this day I have no idea what it was:

CAM00284

I did some googling and found some people using Mr. Clean Magic Erasers to get their games clean from sharpies and pretty much every other grime you’d encounter.  They were mostly right, this thing works some real miracles!

Mr Clean Good          ========>>>>>>>>>>>>>>>>>>>  DSC02252

However there is a dark side to the Magic Eraser!  I’m not sure what the eraser is, but there appears to be a buffing action associated with it and softer materials such as plastic (and will ruin game labels).  In other words, it will destroy the stains, but also remove some sheen or texture off the plastic on some of your carts and gaming peripherals:

Mr Clean Bad  ==================>>>>>>>>>>>>>  DSC02254

I know it doesn’t look like much, but it is noticeable in person if you have two carts next to each other and know what you’re looking for.  In my opinion though, the Beast Wars cart was in such bad shape that it actually looks way better clean and less shiny than shiny and disgusting.  (By the way, I found that little gem for 15 bucks!  If you’re not aware, Beast Wars: Transmetals was a Blockbuster exclusive that was never actually sold in retail stores.  Most have blockbuster stickers on them, but I was able to remove mine over the course of an hour and a half of very, VERY fine peeling using my fingernails.)

How To Remove Security Labels And Price Tags That Are On Top Of The Game Label:

There’s no real secret here except patience.  Lots and lots of patience.  You have to go VERY slow to do this right.  You also need some moderately long fingernails.  They need to be flexible fingernails, so no crazy ass Shaniqua nails!

But really, I have yet to find ANY other tool or method that works better than a good ol’ fingernail.  I’ve removed blockbuster security labels and price tags with that crazy anti-tampering adhesive from some valuable cart labels.

Pick at a corner by slicing your fingernail underneath the label and start from there.  Going AS SLOW AS POSSIBLE.  Go too fast and you’ll rip the label underneath very easy!  As the label comes up, slice away the adhesive with your nail when it stretches as you’re peeling the label.  Be careful when you pick at it, it’s easy to leave a fingernail indention in the game’s label if you press too hard.  Sometimes it is all about slicing because it’s the type of sticker you can’t just start peeling.  These are the ones that require the marathon peeling sessions.  I’ve spent an hour and a half on more than one cart doing this!

That’s about it though.

As far as the label residue, there’s nothing to be done.  Alcohol on labels that don’t have a glossy film on top will eat the color away very quickly.  It will also weaken the adhesive under the label and over time that label will start to peel.

Anything I missed?

Fix For Crappy Video On Some Sega Genesis Model 2 Systems (KA2195D Video Encoder)

If you’re not interested on the background to this fix/mod, skip past the winding paragraphs, down to the guide.

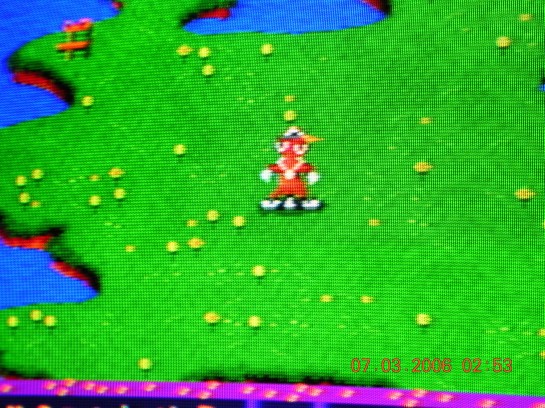
This is my first original mod/fix done back in 2006.  I was pretty new to console modding, and electronics in general.  I got a free Sega Genesis from a family friend, and was extremely disappointed when I saw the quality of the composite video output.  There were vertical lines in the background at specific points much like the NES model 2 composite video but much worse.  It was hard to play Toejam & Earl when all of Toejam’s limbs were connected!  No wonder I was so envious of my neighbor when he got a Super Nintendo for Christmas ’91 and I got a Sega Genesis!

As an aside, I loved my Genesis, and had asked for it by name.  The lack of games was very frustrating to a 7 year old though.  My mother took me to the rental place in the drug store every Thursday.  Every week they’d have more cool SNES games, but maybe one or two new sports games for the Genesis (I hated sports as a kid!  Video games were my escape from sports and all the athletic kids.  The last thing a budding nerd wanted to do was escape into the mystical world of “PGA Tour III”!).

Only the Genesis with the KA2195D video encoder have this issue from what I understand (A list of the different hardware on different board revisions of the Genesis and their strengths and weaknesses).  It’s my impression that the KA2195D video encoder is not a bad encoder, and it’s not the real issue.  From the research I did back in the day, my guess is poor board layout that lead to lots of noise, possibly on the +5v rail, which lead to a noisy 3.58MHz clock to the encoder.  The fact that the vertical lines were at specified points on the screen at different points on the refresh rate on the TV lead me to suspect the clock signal since the lines were so consistent and stable.  Random noise from something else would have induced well, random noise on the video.  I took some o-scope video of the signal back then and it was pretty rough.  There was some high frequency noise.

I solidified my noisy board theory recently when I did the ol’ Crystal Clear Audio Mod (If you haven’t read about it, Google it or read my next blog entry… whenever that is [or buy my CCAM Genesis on Ebay]. This blogging stuff has been a big enough pain in the ass already).  Without a separate voltage regulator on your CCAM, there is some really bad buzzing on the audio output.  Using a separate 7805 eliminates this noise.

I looked at the datasheet for clues on how the chip was supposed to be interfaced and found the clock input.  I decided to use a crystal can oscillator at 3.58 MHz.  I cut the original clock line and fed the can oscillator to pin 6.  Voila! beautiful, flawless composite video (As beautiful and flawless as composite can be)!  I posted on the Gamesx forum about this back then.  Someone said they tried to build their own crystal oscillator circuit, as per the diagram in the datasheet, and it didn’t work right.  The Quartz Crystal Oscillator, often times called a Can Oscillator, is what I used and it does work.  Perhaps the can oscillator has an input voltage filter on the PCB inside it.  Maybe a ceramic resonator would work too, but who cares?  We know what works!

I submitted this to the guy at www.gamesx.com  (Pretty much the original source for console mods)   and he said he’d post it, but never did.  So without further interruption…

Tutorial!!!!!!!!!!!!!!!!!!!!!!!!!!!!!!!!:

This tutorial will show you how to remove the vertical lines that plague the NTSC Model 2 Sega Genesis version.  It will show you how to feed a new clock signal to the video encoder chip to clean up the composite video.

As with any hardware modification, your results may vary, and I’m not responsible for damages or unsatisfactory results. Please make sure you are skilled in soldering before you attempt this mod!

sega mod

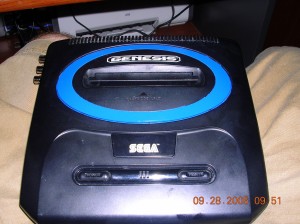
The Sega Genesis Model 2 is the second version of the original Sega Genesis.  It was made to be smaller with a sleeker design.

The things you will need are:

  • Soldering iron with solder
  • Exacto Knife
  • 3.58 MHz Can Oscillator
  • Philips Screwdriver
  • Some 22 gauge or smaller wire

Fortunately for us the Sega isn’t fastened together with funky security screws.  All you need is a Philips head screwdriver to unscrew the 4 screws underneath the case.  After that, lift the top of the case off and set it aside.

Now you should see the large metal RF shield encasing.  Look for the 8 screws lining the outer edge of the board that hold the shielding down.  Unscrew all 8, lift the shielding up and set it aside.

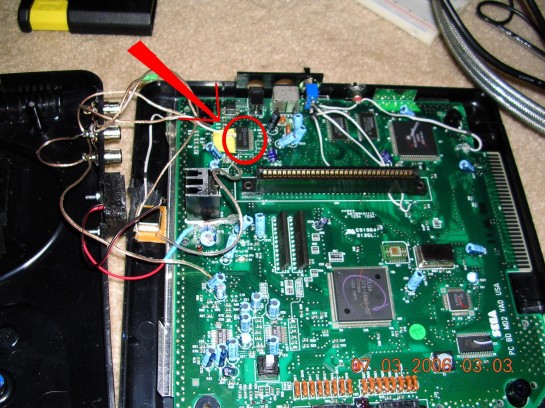
Now examine the circuit board, and find a chip in the top left corner labeled KA2195D.

sega mod 2

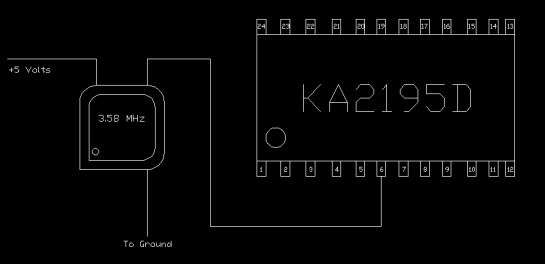
This is the video encoder chip we’ll be dealing with.  Find a nice spot to put your oscillator where the console’s case can still close and the oscillator won’t touch any exposed wires or pins.  Using the diagram below, locate pin 6 of the chip (start counting at the small circle indention in the bottom left of the chip.  This indicates pin 1).  This is the pin we’ll feed the output of the oscillator to.

Sega Mod 3

Before you can solder the new clock signal to pin 6, you must sever the pin from its original clock by lifting it off the board.  To do this, after tinning your soldering iron, touch it to the pin to melt the solder.  Then quickly but carefully slide the exacto knife blade underneath the pin, and gently lift.

Now that it is lifted you can solder the wire from the output pin of the oscillator (the pin diagonally from the little black dot on the oscillator) to the now lifted pin 6.  Be very careful when soldering to this pin, it can snap off or cause heat damage to the chip if you leave the iron on it too long.

After it is soldered, I usually surround the connection with hot glue (update 2013: JB Weld works way better and is permanent) to help keep the pin safe from vibration (dropping your system) or if I were to accidentally pull on the wire.

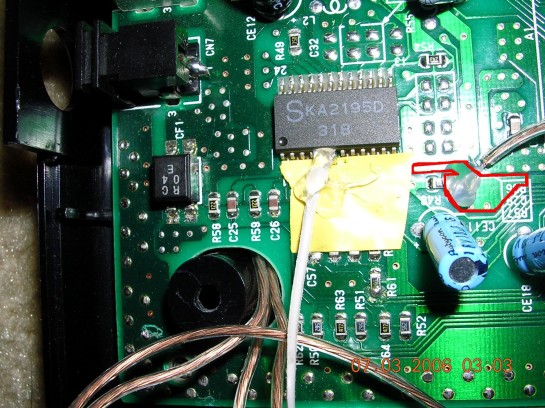
Now that the pin is connected to the new clock signal, you must provide power to the oscillator.  You can use the picture below to find a place to solder the +5v pin of the oscillator to.  Anywhere inside the red box is appropriate because it provides +5v to the chip through pins 12 and 19 only when the system is on.  There are a few via holes to solder a wire to in the red box, or to the soldering point on the one side of the black surface mount resistor (R48 in the picture).

Sega Mod 4

The ground for the oscillator can be found all around the outside of the board.  On pins 1 and 24, or you could even tie it down to one of the screws that hold down the RF shield, but I recommend soldering it somewhere.

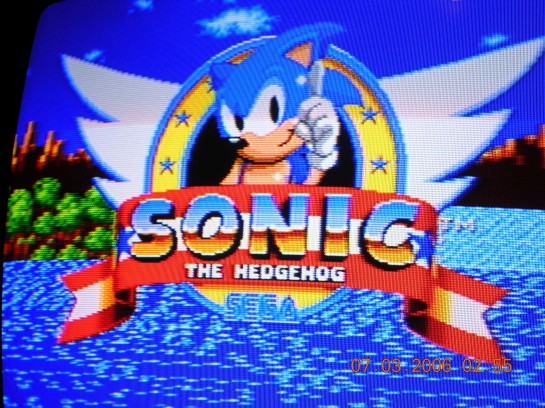
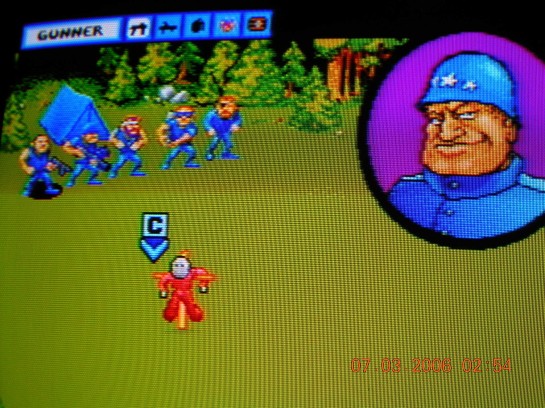
And that’s it!  Boot up your system with your favorite game and enjoy the crisp graphics.  If you’ve played on the system long enough with the lines, you will notice a great difference.  Here are some after pictures (there are no before pictures 😦  ) :

Sega Mod 5

Sega mod 6

Sega mod 7

The Worst Introduction You’ve Ever Read

I haven’t blogged for about ten years.  I think the last real “blogging” I did was on Xanga, and before that, Free Open Diary.  I outgrew it after a few years of saying things that, if I ran for president one day, would come back to bite me in the ass.  I wish I could say the absurdity of something called an ‘open diary’ finally hit me around college but nay, I just switched formats. MySpace and Facebook became the continuation of the popularity contests and ego boosts I craved in high school (and they made it easier!).  I’d like to think I’ve put all that attention whoring aside now that I’m almost 30.  Maybe I can actually contribute something to the world without being a black hole that people throw their time into like so many shaved dollar bills at a stripper’s face.

With that said, let me humble myself further.  Most of the things I’ve done console-wise were on the backs of others in the community who did the hardest work first.    Some things are original, but many came as a result of stalking forums and learning from others.  Once upon a time there was a startup console mods forum called “Underground Console Mods” that I was a part of.  It was a magical place where you could share ideas and ask questions without getting flamed by some stickler out to prove to the entire community that he is god and you are his own personal penis pump.  They shut down, and I kind of lost interest in console modding for awhile.  I couldn’t break into the popularity machine of the other forums enough for anyone to answer any of my questions or listen to any ideas I had, so the passion flamed out.  It was rekindled when I met a friend IRL with the same interest in classic gaming and electronics (The fact that I’m now an adult with a real career and extra cash doesn’t hurt either).  He’s got some great executions of original ideas and other projects on his blog here:  http://www.nobitleftbehind.wordpress.com

One more thing; I’ve got an accredited engineering degree from a University, but I don’t know jack about a lot of things.  Engineers forget a lot of the things they learn in school when they go on to specialize in their career field.  I know electronics pretty well, but factoids about this system or that component escape me often.  I’m not here to pump myself up in any way.  I’m going to try my best to make sure the things I say are accurate.  Most of the time I’ve had first hand experience with the things I will be blogging about, but I do tend to dispense BS regularly when I haven’t researched something thoroughly enough.  I’m not going to flame you if you ask questions, and I will answer questions if asked (and will ask some myself).  I can take constructive criticism too.  So here goes my slightly-more-than-half-assed attempt at contributing to the community and documenting the things I try.